In the age of digital photography and endless snapshots captured on smartphones, the art of displaying cherished memories has evolved into a creative endeavor known as the photo wall gallery. These curated displays not only showcase photographs but also serve as a canvas for personal expression and artistic flair. Whether you’re looking to adorn your living space with family photos, showcase travel memories, or simply infuse your home with personality, mastering the art of the photo wall gallery is a gratifying and fulfilling endeavor.
In this comprehensive guide, we’ll delve into the intricacies of planning, designing, and executing your very own photo wall gallery. From selecting the perfect layout and arranging photos with precision to hanging artwork securely and incorporating decorative elements, each step plays a crucial role in transforming a blank wall into a captivating visual narrative.

What is a Photo Wall Gallery
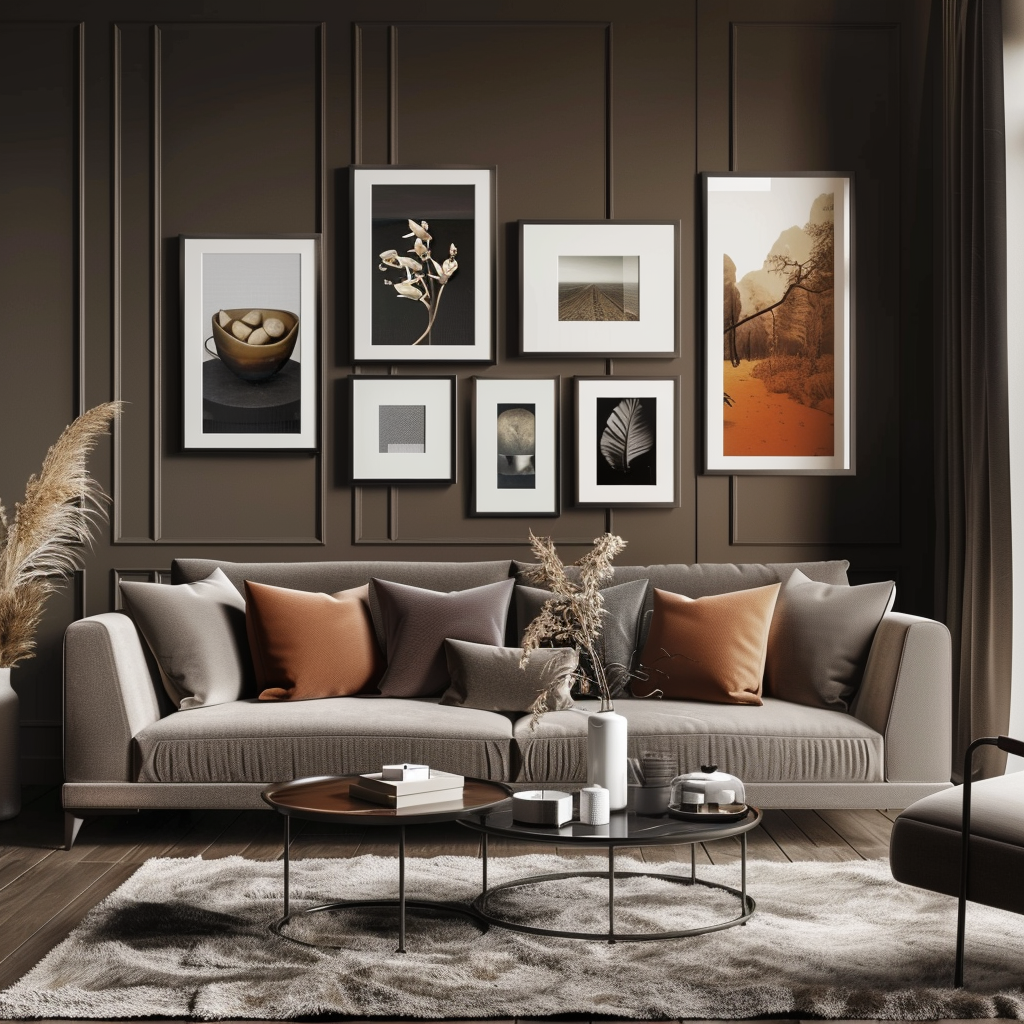
A photo wall gallery is a display of photographs arranged creatively on a wall. It can feature a variety of images, such as family photos, travel snapshots, artwork, or a combination of all. People often arrange the photos in different sizes and frames to create a visually appealing collage or grid.
The concept of displaying photos on walls dates back centuries, but the modern idea of a photo wall gallery gained popularity in the late 20th century with the advent of affordable photography and printing technologies. Initially, it was common to see framed family portraits or artworks hung on walls, but the trend evolved to include more casual and diverse arrangements. One of the earliest forms of photo wall galleries emerged in the 1970s with the popularity of “salon-style” hanging, where multiple artworks or photos were arranged closely together to create a visually rich display. This approach was inspired by the salon exhibitions of the 19th century, where artworks were hung from floor to ceiling in crowded arrangements. In the late 20th and early 21st centuries, advancements in digital photography and printing made it easier and more affordable for people to print and display their own photos. This led to a surge in personalized photo wall galleries, where individuals would arrange their own photographs in creative and meaningful ways.
Today, photo wall galleries continue to evolve with trends in interior design and personal expression. They serve as a way for people to showcase their memories, interests, and artistic sensibilities within their living spaces. Additionally, social media platforms have influenced the popularity of curated photo displays as people seek to create Instagram-worthy spaces in their homes.
Importance and Benefits of a Photo Wall Gallery
Creating a photo wall gallery isn’t just about filling empty wall space—it’s about curating a visual narrative that reflects your unique story and adds depth to your home’s ambiance. Here’s why investing time and effort into crafting a photo wall gallery is both meaningful and rewarding:
Personalized Expression: A photo wall gallery allows you to showcase your personality, experiences, and interests through carefully curated images. Each photograph tells a story, creating a personalized tapestry that speaks volumes about who you are and what matters most to you.
Emotional Connection: Surrounding yourself with cherished memories and moments captured in photographs fosters a sense of emotional connection and nostalgia. From family gatherings to travel adventures, each image serves as a reminder of the people, places, and experiences that have shaped your life.
Visual Impact: A well-designed photo wall gallery can transform any room into a visually stunning space that captures the attention of visitors and sparks conversation. By thoughtfully arranging photographs according to color, theme, or style, you can create a cohesive and eye-catching display that elevates the aesthetic appeal of your home.
Conversation Starter: A photo wall gallery isn’t just for decoration—it’s a conversation starter that invites guests to engage with your space on a deeper level. Whether sharing stories behind individual photos or reminiscing about shared experiences, your gallery serves as a catalyst for meaningful connections and interactions.
Motivational Inspiration: Surrounding yourself with images that evoke positive emotions and memories can serve as a source of daily inspiration and motivation. Whether it’s a photo of a milestone achievement or a breathtaking landscape, your photo wall gallery can remind you of your goals, dreams, and aspirations, fueling your drive to succeed.
Planning Your Photo Wall Gallery
Choosing the Right Wall
When embarking on the journey of creating a captivating photo wall gallery, selecting the appropriate wall is paramount to its success. Consider the following factors:
Considerations for Wall Selection: Assess various walls in your home based on their size, visibility, and compatibility with your aesthetic preferences. Opt for a wall that serves as a focal point or complements the existing decor, ensuring that it enhances rather than overwhelms the space.
Evaluating Lighting and Space: Take note of the natural and artificial lighting conditions surrounding the chosen wall. Ensure adequate illumination to accentuate the photographs without creating glare or shadows. Additionally, assess the available space to determine the optimal arrangement and layout for your gallery, considering factors such as furniture placement and traffic flow.

Selecting Photos
Once you’ve identified the ideal wall for your photo gallery, the next step is to curate a collection of images that will bring your vision to life. Consider the following aspects:
Theme or Concept: Define a cohesive theme or concept that ties the photographs together, whether it’s based on a specific event, location, or emotion. This thematic approach adds depth and narrative to your gallery, creating a unified visual story that resonates with viewers.
Variety and Balance: Strive for a diverse selection of photographs that offer variety in subject matter, composition, and style. Incorporate a mix of portraits, landscapes, candid moments, and artistic shots to maintain visual interest and balance. Experiment with different sizes, orientations, and arrangements to create dynamic visual compositions that captivate the eye.
Printing and Framing Options: Explore various printing and framing options to enhance the aesthetic appeal of your photographs. Choose high-quality printing materials and techniques that showcase the richness of colors and details in your images. Select frames that complement the style of your decor, whether it’s sleek and modern or rustic and vintage. Consider unconventional display methods such as canvas prints, acrylic mounts, or gallery wraps for a contemporary twist on traditional framing.
Designing Your Photo Wall Gallery
When embarking on the journey of creating a photo wall gallery, the initial steps are crucial in laying the foundation for a visually striking and cohesive display. Crafting your gallery involves thoughtful consideration of layout options, careful selection of materials and tools, and curating the perfect mix of photos and artwork to adorn your walls. The key aspects of designing your gallery are determining photo sizes and frames, creating a balanced layout and ensuring even spacing.
Layout Options
When designing your photo wall gallery, exploring various layout options can significantly impact the overall aesthetic and visual impact of your display. Consider the following layout options:
Grid Layout: Organize your photographs in a symmetrical grid pattern, with equal spacing between each image. This layout creates a clean and structured look, ideal for showcasing a collection of images with similar themes or subjects.
Salon-style Gallery: Embrace an eclectic and layered approach by arranging photographs of different sizes and orientations in a salon-style gallery. Mix and match frames and images to create a dynamic and visually engaging display that reflects your personality and style.
Linear Arrangement: Opt for a linear arrangement by aligning photographs along a horizontal or vertical axis. This layout works well for narrow or elongated walls, creating a sense of continuity and flow that guides the viewer’s eye from one image to the next.
Asymmetrical Composition: Embrace asymmetry and experimentation by arranging photographs in an organic and free-flowing manner. Play with varying heights, angles, and distances between images to create visual interest and movement, evoking a sense of spontaneity and creativity.
Mosaic Layout: Similar to a grid, but with varying sizes of photos to create a more dynamic and visually interesting display. The mosaic layout adds depth and texture to your gallery wall, allowing you to highlight specific images while maintaining overall coherence.
Symmetrical Layout: Arrange pictures symmetrically around a central point or axis, creating a balanced and organized look. This layout is perfect for creating a focal point in your space and works well with formal or traditional decor styles.
Random/Scattered Layout: Place photos randomly or scattered across the wall, giving a more eclectic and informal feel. The random layout allows for creative freedom and personal expression, making it ideal for showcasing a diverse collection of images.
Diagonal Layout: Arrange photos diagonally, creating a dynamic and modern look. The diagonal layout adds energy and movement to your gallery wall, drawing the viewer’s eye along a dynamic path that enhances visual interest.
Overlap Layout: Allow photos to overlap partially or fully, creating a layered effect that adds depth and dimension to your display. The overlap layout adds visual complexity and intrigue, inviting viewers to explore and engage with your gallery wall on multiple levels.
Frameless Layout: Mount photos directly on the wall without frames, giving a minimalist and contemporary appearance. The frameless layout creates a sleek and streamlined look, perfect for showcasing large-scale prints or creating a gallery wall in a small space.
Collage Layout: Arrange photos in a collage-style format, with overlapping or interlocking images for a cohesive yet artistic display. The collage layout allows you to experiment with composition and arrangement, creating a visually striking gallery wall that tells a story or conveys a theme.
Tools and Materials
To bring your photo wall gallery to life, you’ll need the right tools and materials to ensure a seamless and professional installation process. Consider the following essentials:
Measuring Tape and Level: Accurate measurements and alignment are crucial for creating a well-balanced and visually appealing gallery. Invest in a quality measuring tape and level to ensure precise placement and spacing of your photographs.
Hanging Hardware: Select appropriate hanging hardware based on the weight and size of your frames. Options include picture hooks, nails, screws, or adhesive strips, depending on the surface of your wall and personal preference.
Frame Hanging Template: Streamline the installation process by using a frame hanging template or layout guide to plan the arrangement of your photographs in advance. These templates help ensure uniform spacing and alignment, saving time and effort during installation.
Protective Equipment: Prioritize safety by wearing protective equipment such as gloves and goggles when handling tools and materials. This precautionary measure helps prevent injuries and accidents while working on your photo wall gallery.

Visualizing Your Layout
Before committing to a specific layout for your photo wall gallery, take the time to visualize different arrangements and compositions. Consider the following strategies:
Mockup Software: Explore mockup software or online tools that allow you to digitally design and visualize your photo wall gallery. These user-friendly platforms enable you to experiment with different layouts, sizes, and arrangements before making any permanent decisions.
Paper Templates: Create paper templates or cutouts of your photographs to experiment with various layout options directly on your wall. Use painter’s tape to temporarily affix the templates in different configurations, allowing you to assess scale, spacing, and composition in real-time.
Gallery Wall Inspiration: Draw inspiration from existing gallery wall designs and layouts featured in magazines, websites, or social media platforms. Analyze the techniques and aesthetics employed in these examples to inform your own design decisions and creative vision.
By exploring diverse layout options, gathering essential tools and materials, and visualizing your layout using digital software or physical templates, you can design a photo wall gallery that reflects your personal style, showcases your cherished memories, and transforms your living space into a visual masterpiece.
Creating Your Photo Wall Gallery
Preparing the Wall
Before you begin hanging your cherished photos, it’s crucial to prepare the wall properly to ensure a flawless display that stands the test of time. Here’s a detailed guide on how to prepare your wall:
Cleaning and Repairing: Start by thoroughly cleaning the wall surface using a mild detergent or wall cleaner and a soft cloth to remove any dust, dirt, or grime. Pay close attention to corners, edges, and areas behind furniture where dirt may accumulate. Once the wall is clean, inspect it for any cracks, holes, or imperfections. Use spackle or putty to fill in any holes or cracks, and sand down rough patches to create a smooth and even surface. Wipe the wall clean with a damp cloth to remove any leftover debris or dust particles.
Painting or Wallpapering: Consider painting the wall or adding wallpaper to create a backdrop that enhances your photo display. Choose a paint color or wallpaper pattern that complements the color scheme and style of your photos, as well as the overall decor of the room. Before painting or wallpapering, ensure that the wall surface is clean, dry, and free of any imperfections. Apply painter’s tape to protect baseboards, trim, and adjacent walls from paint or wallpaper spills. Once the paint or wallpaper has dried completely, remove the painter’s tape and admire your freshly painted or wallpapered wall.


Hanging Photos
Now that your wall is prepped and ready, it’s time to hang your photos with care and precision. Follow these step-by-step instructions for a professional-looking display:
Step-by-step Hanging Guide: Start by laying out your photos on the floor or a large table to experiment with different layouts and compositions. Consider factors such as photo orientation (portrait or landscape), photo size, and spacing between photos. Once you’ve finalized your arrangement, use a pencil to mark the positions of the photo corners on the wall. Use a tape measure and level to ensure that your markings are straight and evenly spaced. Depending on the weight of your photos, choose appropriate hanging hardware such as picture hooks, nails, or adhesive strips. Install the hanging hardware at each marked position, following the manufacturer’s instructions for proper installation. Once the hardware is installed, hang your photos carefully, ensuring that they are level and securely anchored to the wall.
Ensuring Alignment and Spacing: Pay close attention to alignment and spacing to create a cohesive and visually appealing display. Use a level or measuring tape to ensure that each photo is hung straight and aligned with neighboring images. Consider leaving equal margins between photos for a uniform look, or experiment with asymmetrical arrangements for added visual interest. Take your time to adjust the positioning of each photo until you’re satisfied with the overall layout.
Adding Personal Touches
Now that your wall is prepped and ready, it’s time to hang your photos with care and precision. Follow these step-by-step instructions for a professional-looking display:
Step-by-step Hanging Guide: Start by laying out your photos on the floor or a large table to experiment with different layouts and compositions. Consider factors such as photo orientation (portrait or landscape), photo size, and spacing between photos. Once you’ve finalized your arrangement, use a pencil to mark the positions of the photo corners on the wall. Use a tape measure and level to ensure that your markings are straight and evenly spaced. Depending on the weight of your photos, choose appropriate hanging hardware such as picture hooks, nails, or adhesive strips. Install the hanging hardware at each marked position, following the manufacturer’s instructions for proper installation. Once the hardware is installed, hang your photos carefully, ensuring that they are level and securely anchored to the wall.
Ensuring Alignment and Spacing: Pay close attention to alignment and spacing to create a cohesive and visually appealing display. Use a level or measuring tape to ensure that each photo is hung straight and aligned with neighboring images. Consider leaving equal margins between photos for a uniform look, or experiment with asymmetrical arrangements for added visual interest. Take your time to adjust the positioning of each photo until you’re satisfied with the overall layout.
Factors to Consider When Selecting Photos
- Theme or Concept: Decide on a theme or concept for your gallery that reflects your personal style, interests, or the purpose of the display. This could be based on a specific subject matter (e.g., family portraits, travel memories, nature scenes) or a cohesive color scheme.
- Balance and Variety: Aim for a balance of different types of images and artwork to add variety and visual interest to your gallery. Mix and match photos of varying sizes, orientations (landscape, portrait), and subjects to create a dynamic display.
- Color Palette: Consider the overall color palette of your photos and artwork to ensure harmony and cohesion within the gallery. Choose images with complementary or harmonious colors that work well together when displayed side by side.
- Sentimental Value: Select photos and artwork that hold sentimental value or evoke positive emotions. These could include family photos, milestone moments, or artwork that resonates with you personally.
- Scale and Proportion: Pay attention to the scale and proportion of your images in relation to the size of your wall and other elements in the room. Avoid overwhelming the space with oversized artwork or overcrowding the gallery with too many small images.
- Consistency in Style: Strive for consistency in the style and aesthetic of your photos and artwork to maintain a cohesive look throughout the gallery. This doesn’t mean all images need to be identical, but they should complement each other in terms of tone, composition, and visual style.
- Narrative or Storytelling: Consider how the arrangement of photos and artwork can tell a story or convey a message. Arrange images in a sequence or grouping that creates a narrative flow or highlights specific themes or moments.
- Practical Considerations: Take into account practical considerations such as the durability of the materials, the framing options available, and any specific display requirements (e.g., lighting preferences, wall space constraints) when selecting photos and artwork for your gallery.
Determine Frame Sizes based on Available Wall Space
- Measure Your Wall Space: Use a measuring tape to determine the width and height of the wall space where you plan to hang your gallery.
- Determine Frame Sizes: Decide on the number of frames you want to include in your gallery and the desired arrangement layout (e.g., grid, salon-style, linear). Choose frame sizes that complement your wall space and layout preferences. For example:
If you’re going for a uniform grid layout, you might opt for frames of the same size (e.g., 8×10 inches, 11×14 inches) to create a symmetrical display.
For a more eclectic salon-style arrangement, mix and match frame sizes to add visual interest and variety. - Calculate Spacing Between Frames: Determine the spacing between frames based on your layout preferences and the overall look you want to achieve. For example:
If you prefer a tight grid layout, you might leave minimal spacing (e.g., 1 inch) between frames for a clean and modern look.
For a more relaxed and organic arrangement, you might opt for wider spacing (e.g., 3-4 inches) between frames to create breathing room and allow each piece to stand out. - Account for Wall Space Around Frames: Consider leaving some empty wall space around the edges of your gallery to frame the display and prevent it from feeling overcrowded. This can also help create a balanced and visually pleasing composition.
Example Calculation:
Let’s say you have a wall space that measures 60 inches wide by 40 inches high.
You want to create a grid-style gallery with 9 frames arranged in a 3×3 configuration.
Each frame is 8×10 inches, and you decide to leave 2 inches of spacing between frames.
Frame Size: 8 inches (width) x 10 inches (height)
Spacing Between Frames: 2 inches
Total Width of Frames: (3 frames * 8 inches) + (2 spaces * 2 inches) = 24 inches + 4 inches = 28 inches
Total Height of Frames: (3 frames * 10 inches) + (2 spaces * 2 inches) = 30 inches + 4 inches = 34 inches
Remaining Wall Space:
Width: 60 inches – 28 inches = 32 inches
Height: 40 inches – 34 inches = 6 inches
In this example, you have 32 inches of remaining wall space horizontally and 6 inches vertically to frame the gallery. Adjustments can be made based on personal preference and aesthetics.

Tips for Secure and Damage-Free Installation
- Plan the Layout: Before hanging any frames, carefully plan the layout of your gallery. Consider factors such as the size and shape of your wall, the number of frames you want to include, and the overall aesthetic you want to achieve. Experiment with different arrangements by laying out your frames on the floor or using painter’s tape on the wall to visualize the design.
- Measure and Mark: Use a measuring tape and pencil to mark the placement of each frame on the wall. Use a level to ensure that your marks are straight and aligned. Double-check your measurements and layout before proceeding with installation.
3. Choose the Right Hardware: Select hanging hardware appropriate for your wall type and the weight of your frames. For drywall, use anchors or screws designed to hold heavy loads. For plaster or brick walls, use specialized hardware like masonry screws or anchors. Adhesive strips or hooks can be a convenient option for lightweight frames or frameless displays.
4. Prep the Wall: Before installing any hardware, clean the wall surface to remove dust and debris. This will ensure better adhesion and prevent damage to your frames over time. Use a mild cleaning solution and a soft cloth to gently wipe the wall surface.
5. Install Hardware: Follow the manufacturer’s instructions for installing hanging hardware or adhesive strips. Use a drill or hammer to insert screws or anchors securely into the wall, making sure they are level and properly aligned with your markings.
6. Hang Frames: Once the hardware is installed, carefully hang each frame according to your layout. Use a level to ensure that each frame is straight and aligned with the others. Start from the center of your layout and work outward to maintain balance and symmetry. Distribute the weight of your frames evenly across the wall to prevent excessive stress on any single point.
7. Adjust as Needed: Step back periodically to assess the overall look of your gallery and make any necessary adjustments. Fine-tune the spacing between frames and adjust the placement as needed to achieve the desired visual balance.
8. Secure Frames: Once all frames are hung, double-check that each one is securely attached to the wall. Give them a gentle tug to ensure they are stable and properly anchored. Make any final adjustments as needed.
Incorporating Additional Elements
In addition to photos and artwork, there are several other elements you can incorporate into your photo wall gallery to add depth, interest, and personality. Here are some ideas:
1. Shelves: Install floating shelves or picture ledges among your frames to display small decorative objects, plants, or additional framed artwork. Shelves can add dimension and versatility to your gallery wall, allowing you to showcase a mix of photos and decorative items.
2. Mirrors: Introduce mirrors into your gallery wall to create visual interest and amplify natural light. Mirrors can help visually expand the space and add a touch of glamour and sophistication to your display. Place mirrors strategically among your frames to create balance and reflection within the composition.
3. Decorative Objects: Incorporate decorative objects such as vases, sculptures, or figurines into your gallery wall to add texture and visual interest. Choose objects that complement the style and color scheme of your gallery for a cohesive look.
4. Typography: Include typography elements such as inspirational quotes, words, or phrases in your gallery wall to add a personal touch and convey a message or theme. You can use framed prints, wooden letters, or vinyl decals to incorporate typography into your display.
5. Lighting: Enhance your gallery wall with strategic lighting to highlight your photos and artwork. Consider installing wall-mounted sconces, track lighting, or picture lights above or around your gallery to create a dramatic effect and draw attention to your display.
6. Memorabilia: Showcase memorabilia or sentimental items alongside your photos and artwork to add storytelling and personal significance to your gallery wall. This could include ticket stubs, postcards, souvenirs, or other mementos from special moments and experiences.
7. Textiles: Integrate textiles such as fabric wall hangings, tapestries, or woven baskets into your gallery wall to add texture and warmth. Textiles can soften the look of your display and create visual interest when layered with photos and artwork.
8. Functional Elements: Incorporate functional elements like clocks, calendars, or chalkboards into your gallery wall to make it both visually appealing and practical. These elements can serve a dual purpose by adding utility while enhancing the overall aesthetic of your display.
Maintaining and Refreshing Your Photo Wall Gallery
Regular Cleaning and Dusting
Keeping your photo wall gallery clean and dust-free is essential for preserving the visual appeal of your display. Dust and dirt can accumulate on photo frames and wall surfaces over time, dulling the overall appearance of your gallery. Here’s how to maintain cleanliness:
Dusting: Use a soft microfiber cloth or a feather duster to gently remove dust from the surface of your photo frames and wall art. Start from the top of the gallery and work your way down, ensuring thorough coverage. Pay attention to intricate details and corners where dust tends to accumulate. Avoid using abrasive cleaners or rough materials that could scratch or damage the frames.
Cleaning: Periodically clean your photo frames with a mild cleaning solution and a soft cloth to remove smudges, fingerprints, or stains. Mix a small amount of gentle dish soap or detergent with warm water and dip the cloth into the solution. Wring out excess moisture and wipe down the frames, taking care not to saturate the surface. For stubborn stains, use a specialized glass cleaner or metal polish. After cleaning, dry the frames thoroughly with a clean, dry cloth to prevent water spots.

Updating Photos or Arrangements
Refreshing your photo wall gallery with new photos or rearranged arrangements can breathe new life into your space and evoke fond memories. Here’s how to update your gallery effectively:
Rotate Photos: Periodically swap out old photos with new ones to showcase recent memories or significant milestones. Consider rotating photos seasonally or on special occasions to reflect changing seasons or celebrate holidays and events. Choose photos that resonate with you and your family, evoking positive emotions and cherished memories.
Rearrange Arrangements: Experiment with different layouts and arrangements to create a visually dynamic and engaging display. Try organizing photos by theme, color, or subject matter to create focal points and visual interest. Mix and match frame sizes and styles to add depth and dimension to your gallery. Get creative and personalize the arrangement to reflect your unique style and personality.
Tips for Seasonal or Occasional Changes
Embracing seasonal or occasional changes can add versatility and excitement to your photo wall gallery. Here are some tips for incorporating seasonal or occasional updates:
Holiday Themes: Decorate your photo wall gallery with seasonal accents or themed decor to celebrate holidays and special occasions throughout the year. Incorporate festive elements such as garlands, ornaments, or string lights to add a touch of seasonal cheer to your display.
Special Events: Use your photo wall gallery to commemorate special events or milestones such as birthdays, anniversaries, or graduations. Create dedicated displays featuring photos from the event, along with decorative elements such as banners, balloons, or memorabilia.
Rotating Displays: Consider creating rotating displays or featured galleries within your photo wall to highlight different themes, subjects, or family members. Rotate displays periodically to showcase new photos or highlight different aspects of your life and experiences.
Inspiring Photo Wall Gallery Ideas
A. Family Memories and Milestones
Capture the essence of your family’s journey by creating a photo wall gallery dedicated to cherished memories and significant milestones. Showcase photos that depict special moments such as weddings, birthdays, graduations, and family vacations. Arrange the photos chronologically or thematically to tell a cohesive story of your family’s growth and evolution over time. Incorporate personalized touches such as handwritten notes, captions, or dates to add depth and context to the display. Family memory walls serve as a heartwarming reminder of the love, laughter, and bonds that unite your family.
B. Travel Adventures
Embark on a visual journey around the world by curating a photo wall gallery inspired by your travel adventures. Display photos from your trips to exotic destinations, iconic landmarks, and breathtaking landscapes. Create a collage of memories that transports viewers to distant shores and exotic locales. Mix and match photos of scenic views, cultural experiences, and spontaneous moments to capture the essence of your travels. Experiment with different layouts and arrangements to evoke the spirit of wanderlust and exploration. Travel-themed photo walls ignite the imagination and inspire a sense of adventure and discovery.
C. Artistic or Thematic Displays
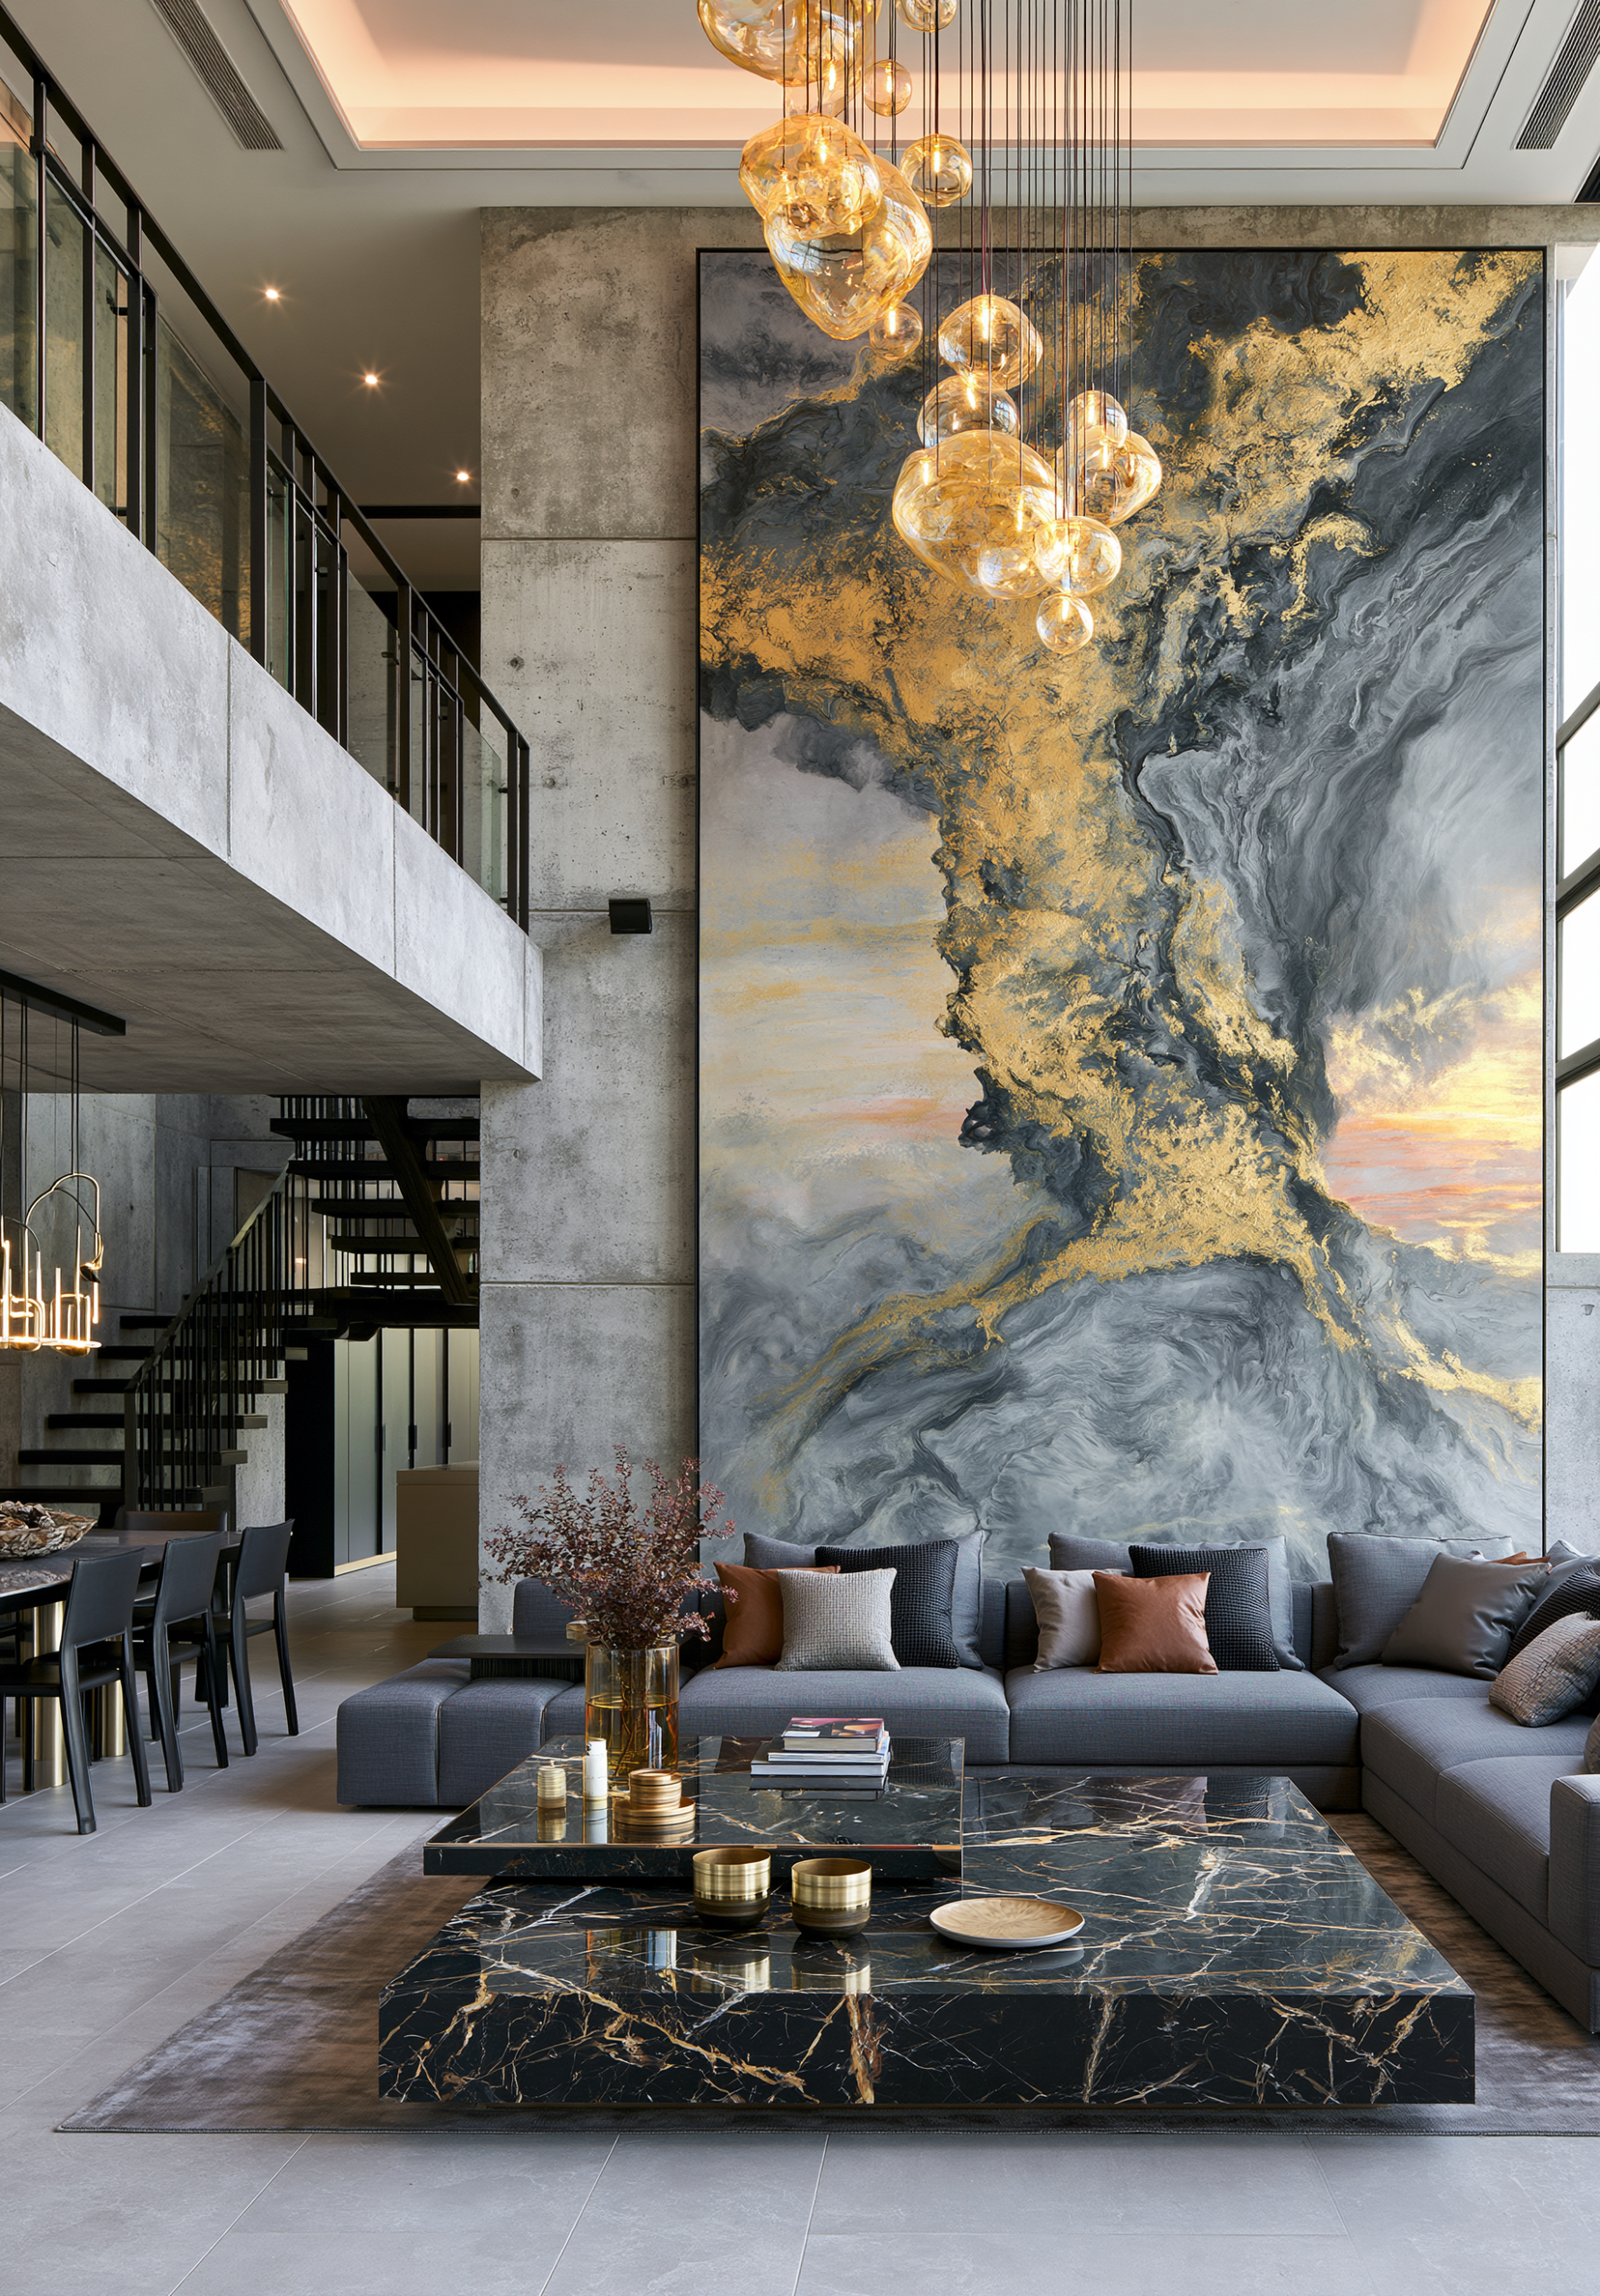
Unleash your creativity and imagination by designing an artistic or thematic photo wall gallery that reflects your unique style and interests. Explore themes such as nature, architecture, abstract art, or vintage aesthetics to curate a visually captivating display. Experiment with creative techniques such as black and white photography, collage art, or mixed media to add depth and texture to your gallery. Incorporate decorative elements such as mirrors, clocks, or shelves to enhance the visual appeal and thematic cohesion of the display. Artistic photo walls serve as a reflection of your personality, passions, and artistic sensibilities, transforming your space into a gallery-worthy masterpiece.


In conclusion, creating a photo wall gallery is not just about decorating your space; it’s about curating a visual narrative of your life’s journey, passions, and memories. Throughout this article, we’ve explored the various aspects of planning, designing, and maintaining a photo wall gallery, from selecting the right photos to choosing layouts and arrangements that reflect your style and personality.
As you embark on this creative endeavor, remember that your photo wall gallery is a reflection of who you are and what matters most to you. It’s a testament to the moments, experiences, and relationships that shape your life and leave an indelible mark on your heart.
- Tags: Inspiration, Trends
What do you think?
Blog
Get fresh home inspiration and helpful tips from our interior designers